Well...hell...it's been almost a month since I last posted anything.
My bad I suppose but I've been busy. In fact I wouldn't even be posting anything right now but I have a blank heat curing in the oven and I'm just sitting here on my thumbs, so what the hell?
Much of bamboo rodmaking is hurry up and wait.
I think when I last wrote that I had three blanks in progress.
Still true.
However, one of the blanks had to be scrapped during final planing when undetected uglies reared their ugly heads. The second replacement blank was dangerously close.
I tried posting some of this stuff yesterday but I had a couple few pics I wanted to show but they were taking forever to load so I'll try it again...
The last pics were of a split out blank for a brother in Canada. That blank was scrapped and another started. Same procedure but different bamboo ya know?
I didn't take any pictures of actually planing but who cares and besides I simply forgot.
But...here is a picture of one of the drudgery's of making bamboo rods. Heating and pressing nodes. This can be very beer intensive as it's practically mindless work.
Heat the node to plastic, press the node to straighten.
I use a heat gun with a fishtail attachment.
The split strip is held a couple of inches over the top of the gun and is constantly moved to heat the area evenly.
Now most things rodmaking seems as though there is no right or wrong way to do any particular task. I know guys who heat a node so hot that it's charred. Their rods are fine as far as I can tell. But imho, the less heat the better. As much as IS needed for sure but I don't think you need to char a piece of bamboo to bend it to your will. Extra heat has been shown to make bamboo and nodes in particular, brittle. Not good.
Enough heat to plasticize the lignum is surprising little. Oh it will feel hot to the touch for sure but not charred. You go beyond the plasticizing and continue onto a hard, brittle, inflexible node. A node treated like that is as likely to crack as a node that hasn't been heated at all. BTW...if you hear your node crack while pressing it...scrap the strip. It's wrecked.
Now on the subject to pressing nodes and heat...The less heat the better as long as the bamboo has softened enough to move and be pliable. NO MORE.
Now I generally flame my bamboo and that is the heat tempering that I give it unless of course someone wants a blond rod.
Now if you use a bench vice to straighten your nodes, you normally heat each node twice.
Once to press the hump of the node and again to straighten a kink at the node.
To get around this twice heating business, a friend of mine, Robert Kope, came up with a quite useful tool.
It's one that is now indispensable in the shop.
Picture if you will, one of the old aluminum can mashers you used to be able to buy and mount to a post or wall. You set the can in, pulled a lever and presto perfect squashed can. This works on the same principal.
Robert's node masher is a lever/cam press that squeezes all four side of a node at one time.
This levered cam is powered by pulling a lever that pushes against 6 valve springs. The valve springs then push an arm against the strip. Now as I understand it, there are 3 springs from a Chevy 350 and 3 from a Ford 360. The springs nest inside each other so each set of springs (3 sets) provides some damn heavy duty but even pressure to a poor little heated node. The node wouldn't have a chance you'd think but bamboo is some tough stuff. The really nice thing here is the time savings. Heat a node once, press from all four sides at once. Cuts the time of drudgery in half. The tool is pricey but I think it's worth it. Hell the savings in beer alone will save you at least a 12 pack per rod. I like that and it will obviously pay for itself in a short period of time.
So after the strips nodes have been pressed and straightened, the strip is ready to be roughed into a "roughly" 60 degree triangle with absolutely no taper to the strip. just correct angles.
Then the enamel is scraped of, any imperfections in the nodes are dealt with and then the strip is ready to plane. Again I'm sorry, no pics of that. I got a little too focused. You're bound to see that somewhere here later on I'm sure.
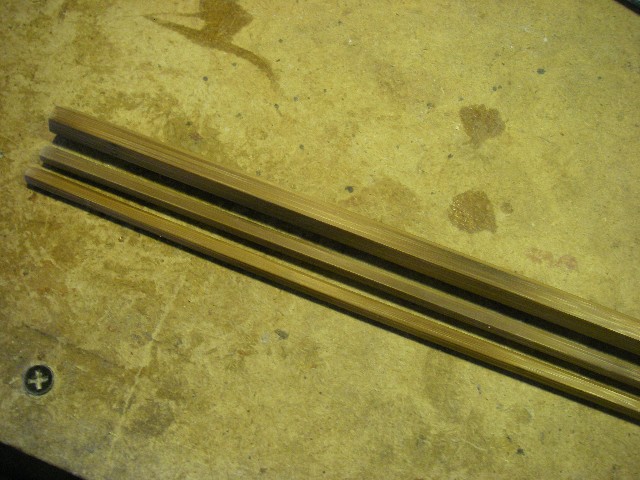
After final planing and you arrive at your desired taper, you're ready to glue them all together.
Here the strips have been aligned, taped together and the butt section has been butterflied, apexes removed and ready for glue.
Now I always have the same problem here. I won't stop gluing once I start. That means no pictures of how to apply the glue and bind them. There is no reason to get glue all over my camera and I'm not changing gloves every five minutes to take another stupid picture.
So, no pictures of running them through the binder, tying loops etc.
Here is the butt hung in the cabinet
and all three sections hung to air dry over night...
This morning, the sections were rebound and are now being heat cured. This increases the heat deflection of the glue to about 285 degrees. These babies will stand up to being on you dashboard in a Sonoran summer without delaming.
The sections are heat treated and cured at 235 degrees for 3 hours.
20 minutes to go on the heat treat and I'm done with that and will be ready to sand the glues off, seal and cut to length.
Sorry for such a long damn post but hell it's been a month ya know?