Pages

Tuesday, October 11, 2011

So...OK!

Moving on with stuff. No one complains if I don't post everyday so why bother? I mean the only two persons reading this crap are in Russia and Serbia looking for stuff to lift and download, stealing stuff if you will... so here's a bit of fodder for those two guys. Knock yer self out.

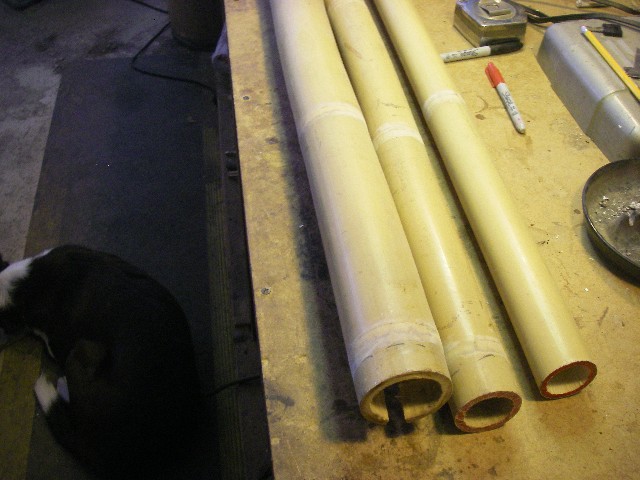
I think the last post where I actually put a pic up of any sort of progress were three bamboo culms cut and on the bench.


Since then, the culms have had the nodes sanded, been flamed (heat tempered) and split in halves. The damns knocked out and the splits re-taped into a single piece again.


Once this is done, then the halves are ready to be split. The halves are split into sixths, the sixths split into halves and those halves are split into halves. Giving you 24 strips of more or less equal widths.


Once you have 24 strips, you need to pick out the best 18 strips. 6 for the butt and 12 (6 for each tip section) for the tips. Sort them and get them aligned.


Once you get your eighteen strips, one of the tricky parts rears it's head...knowing where your ferrules and tip top will fall on the rod.
The general rule of thumb is no node closer than two inches to a ferrule or tip top. That means you need to know how much longer you need to cut your strips, how much of that length will ultimately be cut off and removed and that your ferrules and tip tops will be in the proper portion of the rod section.
Now this particular rod is is going to be a 7'6" 4wt. The finished length of each rod section is approximately 45" long. Since that length depends on the length of the male and female ferrules and length of the tip top, to make each section 45" long now means something is going to be long or short when the time comes to mount the tip top and ferrule, so...the thing to do here is make the sections longer. In my case 5" longer as the adjusting stations on my planing forms are 5" on center. This actually makes life MUCH easier.

SO...I slide around the groups of 3 strips. The first thing is to get the nodes even spaced out.
There are quite a few different methods and reasons to space out one's nodes in a particular way. I'm not going into why you should or shouldn't space your nodes in any way in particular. I'm just going to leave you with I space mine 2x2x2. I have my reasons and if you want to know, ask.


After I get the nodes spaced, it's time to decide where to make your cuts for section length. Again this depends on where your tip top and ferrules are ultimately going to end up on the glued up rod sections.

I decide on this piece of bamboo, it's going to be here...

Now on this end (butt end) the actual end of the rod section is going to be about 5" to the left of my red cut off mark...5" from the mark will put my final cut-off between the first and second sets of nodes on the left. At least two inches from any male ferrules and on the tip side it works out the same. No node closer than two inches from the tip top.

Many times it's not anywheres near as easy as this rod and you have to do some finagling...but this one is just fine!

More or less later...

Mike

Saturday, October 8, 2011

for your consideration...

I have been intrigued for some time with the process of "Japaning" ferrules and reel seat hardware.

This was an accepted pratice for many old dead guys. It's not as easy as it looks and yet is.

This was sent to me, yet again, by Royce Stearns in Oregon. He's more than getting the hang of it and I hope to learn some good things from him.


Now these two pictures really don't do justice to just how nice this piece of metal looks, but it's damn pretty. It's something I would like to offer at some point and there is still some lot of work to be done but I like it.
If one wants to "truly" blacken a piece of nickel-silver...Japaning is absolutely the only true black I have seen.
Even the original Payne Formula, as almost perfect as it is, will leave you an oxidized, blue/black (black pearl) beautiful finish, but it's not truly black.

so, today...

Today I get on 3 new rods.
From left to right...an 8' 6" 3pc 7wt Payne Canadian Canoe...one of the smoothest casting rods, in a 7wt 3pc configuration, I have ever had the pleasure to cast, next is yet one more Payne 100 and I hope the last of the years 100's. I think this will be the 5th or 6th "100" I have made this year, and lastly on the right, an F.E. Thomas 7 footer for a three wt. Simply one of the finest 7 footers for a three weight you could ever hope to fish. Sweet and smooth as chocolate is the only way I can think of to describe this rod ans she will go to a girl in Michigan.

The very butt ends...these will be unceremoniusly chopped off as time goes on. Yes the CC has a bit of bend in it but it won't be there when I'm done...I hope...
That CC is almost 4" across the butt end. It is a piece of bamboo I was saving exactly for a rod like this. Deep power fibers, extremely hefty, simply perfect for a he-man's rod as the Canoe is.
The 100 is also a butt section, quite straight and solid for a 4 wt. The last one is straight as an arrow, more than adequate power fibers for a three weight and should make one sweet as chocolate rod.

Other new stuff

Along the lines of "new for me stuff" is a spool of thread Royce also sent along with the bluing solution.

Now I love classic colors.
By that I mean wrap colors. Thread that was used on grandpa's rod ya know?
Those threads and colors probably passed the bend in the river about the time your grand dad did to.

There were some great colors used that at the time that were as common as dirt. Now almost impossible to find. When you can find a spool, it's pricey as all hell, likely the wrong size and what you have is likely to be all you'll ever have.

So to back up a little bit...I am (was) a Pearsall's fan. I've used it for fifteen years. Gossamer is my favorite size. I lately have been using Naples. Slightly larger thread, not enough to notice really unless you're the guy wrapping the rod. My tipping is still Gossamer though.

A few years ago, Pearsall's has been having their thread made in an oriental country. Since that has happened I have (personally) noticed that many things, I came to take for granted, have gone down the tubes.
For starters...thread quality, colors and knots.
For quality...I could have never asked for better than what Pearsall's offered. Never a fuzzy, rarely a knot, and dye lots always consistant. By dye lots being consistant I mean...I always bought a BOX of thread. Never a spool or two. Dye lots, by the box, assured an even color from one spool to another.
The thread Pearsall's sell's today doesn't even assure any guarantee that the color will be consistant on the same damn spool!
Oh yes...scarlet will still be scarlet or whatever you are wrapping...but the wraps 'could' turn out blotchy looking. You'll likely think you did something wrong with your tension, varnish, oil on your hands, etc.
But the fact is...(sorry Pearsall) the dye is uneven. It's simply not the same color or consistancy. It vary's, foot by foot, on the spool. Now this isn't something that's even going to make a knats ass difference while you're on the stream ya know? But if you're paying top dollar, that's what you should get.

Knots...well...what comes out of a silk worms gut is only so long. It certainly isn't forty five yards long. The silk has to be "knotted." I don't know if there is a machine that can do this properly. There could well be, BUT...while I was used to getting a "knot" that was detectable once maybe every spool, I know get three or four every spool. The time to make things right are not being spent anymore. That's the opinion of me only. I'm not trying to slander Pearsall. Now I don't know about you...but I'm not wrapping a 2/0 guide (which is damn tiny in the first place) and have a freaking knot show up on the foot or back side that will leave a lump forever when varnished. Period.

Now for an important point...price...
A freaking teeny 45 yard spool of Pearsall's is 3 bucks for 45 yards. I mean really?

So...I've been looking around.
I think I might have found a great replacement for at least the main color wraps.
A company named Kimono is making some damn NICE silk. Great colors, old colors, great consistancy of size, color, knots etc, 220 yard spools.

Here is an orginal Belding spool of Pongee 5010 and a QUITE similar color of Kimono  365;

Smaller size, almost perfect match not even as much as a pantone shade off. Much closer than Pearsall's "amber." I like it.
Last month (which was a post or two back) I showed a dismal failure at bluing. This was my go to, hard earned, very pricey shit that was supposed to last me the rest of what's left of my life.
It just looked like hell.

Now I also have a bottle of Jeff Fultz' stuff which I have never tried.
But a brother in Oregon, Royce Stearns, an accomplished fly tier and rod maker, sent me a bottle of LeClair's Payne solution.
Well...it wasn't. It's the solution he uses and sells to blacken piano wire that one would use to make home made snake guides. It's what he offers if you bought his "Snake Maker"
I thought I would try it anyway...

The first try was dismal.
I tried it on a plug of nickel-silver.
The first try was just hopeless. I mean, the metal only darkened where the solution was applied quite heavily and only where it beaded up on the metal.

So...I sipped me beer and went through the stages of total rejection to "maybe if I did this."
So realizing that the NS I was trying to oxidize was raw, unpolished, prolly oil coated, metal, I decided to try and polish it out a bit, clean thoroughly, allow the solvent to totally evaporate and try it again...
This happened!

Now there's a lot more prep to make that color happen, and it isn't even really supposed to happen with this metal but I got it to work.
The jury's still out if I will actually use this on a customer's rod, but it's promising.

Tuesday, October 4, 2011

I'm a papa!

Newly hatched, minutes old, corn snake

Somehow the shop is also now a managery of sorts.

Besides Bonnie the dog and Callie the cat, there are a fair amount of snakes and lizards living here now along with the rats and crickets needed to feed them.

In fact, there is very little elbow room and working has become much harder stepping around all the cages but they're here, they're alive and I'd like to keep it that way.

So...been baby sitting a clutch of these eggs for two months now. It hasn't been easy.

They need a temperature range of between 76 and 86 degrees. Considering the summer is finally ending and inside shop temps have been in the mid 90's and 100+ outside for the last six months or so, steps to keep the eggs cool enough has been a 24 hour a day job involving ice packs and continuous monitoring of the eggs temps with ideal being 82- 83 degrees.
Diligence paid off today as the first baby crawled out of his shell and into the new world.

Welcome...


Anniversary

October...normally when nature tells the natural world to start scaling back.
Winter and hard, cold times are coming.

And yet, October celebrates my third year in this rathole.
3 gotam years!

Little has changed and yet so much.

I won't go into the why's and wherefores of how I came to be here, but I'm here.
I won't go into why I decided to once again take a leap and rent shop space, pay through the nose on the morning of the worst economical disaster to hit the US since the great depression.
The simple fact is I'm here and I'm keepin' on.

When I started here in this hole...I had been making bamboo for 11 or 12 years I think. In those 11 years or so I had made somewhere around 150 fly rods and repaired or refurbished god knows how many.

My apparent all time high was a couple of years before I moved to AZ in about 2004.
For two years in a row I made 24 rods a year, two per month.
I came close to stopping. I don't make rods on a mill. I make them by hand. I have machines sure...but they really don't speed up production very much. They simply reduce wear and tear on a man who has come to understand his mortality.

Anyway...happy anniversary to me!

Cheers!

Saturday, October 1, 2011

Big Doin's

Yep...once a year the shithole (er...the community) pulls together for two days and celebrates "Old Congress Days."

There's usually a crappy swap meet/craft show held across from the fire station, the community center hosts a "Taco Salad" meal for 4 bucks and the highlight for me is the parade! Now I will say this...supposedly they had an honest to god chili cookoff. But at three bucks for a cup and spoon to taste a half dozen chili recipies...well...I'll walk home and eat a couple of hot dogs and put the extra money in the bank.

Yep, where was I? Oh yeah...an honest to goodness parade! The State shuts down the highway long enough for the parade to march from the Post Office all the way to the fire station. Takes about 5 minutes (barring delays in front of the judges "booth.")

Here, both of the town's Boy Scouts and their sister proudly lead the parade. The banner announces that the Grand Marshal of the parade is right behind them.
Yes, it was quite a turn out.

He's riding in a Genuine Yavapai County Street Sweeper
(I shit you not.)


As you can see, Bonnie is quite impressed.


The County Sheriff shows off his new paddy wagon


There were horses


And wagons

And floats!
Complete with a child the girls there taught to 'sit' on command


Yep...it was a real dog & pony (and goat) show

The parade ended with the pride and joy of Congress...
Our new fire truck!

Our parade just gets bigger and more extravagant every year.
Along with the parade and swamp meat, today a gymkhana was held I think and tonight a dance inside the fire station guaranteed to last into the wee hours of the night...9:00PM I think.

Can't wait 'til next year.